This post may contain affiliate links which means I may receive a commission for purchases made through links. Learn more on my Private Policy page.
Have you ever wished you could effortlessly monitor and control your irrigation system from anywhere, without having to physically be at your property? Well, your wish has been granted! In this article, we will explore some effective methods to remotely monitor and control your irrigation system. With the advancements in technology, managing your irrigation system has never been easier. Whether you are a busy homeowner or a professional landscaper, these methods will save you time, money, and ensure that your plants receive the right amount of water when they need it. So, let’s dive in and discover the perfect solution for your irrigation needs.
1. Installing a Smart Irrigation Controller
Benefits of a Smart Irrigation Controller
A smart irrigation controller is a technology that can revolutionize the way you water your garden or lawn. By using advanced sensors and intelligent algorithms, a smart irrigation controller can optimize your watering schedule based on real-time weather data, soil moisture levels, and the specific needs of your plants. Some of the key benefits of installing a smart irrigation controller include:
-
Water Conservation: One of the primary advantages of a smart irrigation controller is its ability to conserve water. By taking into account factors such as weather conditions and soil moisture levels, the controller can adjust the watering schedule accordingly, preventing overwatering and reducing water waste.
-
Cost Savings: By conserving water, a smart irrigation controller can help you save on your water bills. Over time, the savings can be significant, especially in regions where water costs are high.
-
Convenience: With a smart irrigation controller, you no longer have to manually adjust your watering schedule or worry about forgetting to turn off the sprinklers. The controller can be programmed to automatically water your plants at the optimal times, giving you peace of mind and freeing up your time for other activities.
-
Healthier Plants: By delivering the right amount of water at the right time, a smart irrigation controller ensures that your plants receive the optimal moisture levels they need to thrive. This promotes healthier root growth, reduces the risk of diseases, and enhances overall plant health.
Features to Look for in a Smart Irrigation Controller
When choosing a smart irrigation controller, there are several key features to consider:
-
Weather Integration: Look for a controller that can integrate with local weather data or a reliable weather service. This allows the controller to make informed decisions about when and how much to water based on the current weather conditions.
-
Soil Moisture Monitoring: A good smart irrigation controller should have the ability to monitor soil moisture levels either through built-in sensors or by integrating with external soil moisture sensors. This ensures that watering is only done when necessary, preventing over or underwatering.
-
Mobile App Compatibility: Check if the controller has a mobile app that allows you to monitor and control your irrigation system remotely. This feature adds convenience and flexibility, as you can make adjustments from anywhere using your smartphone or tablet.
-
Ease of Installation: Consider the ease of installation and compatibility with your existing irrigation system. Some controllers may require professional installation, while others can be easily installed as a DIY project.
Steps to Install a Smart Irrigation Controller
Here are the general steps to install a smart irrigation controller:
-
Turn off the power to your existing irrigation system and disconnect it from the main water supply.
-
Remove the old controller and disconnect the wiring.
-
Install the mounting bracket for the new smart irrigation controller.
-
Connect the wiring according to the manufacturer’s instructions, ensuring that each wire is securely attached to the corresponding terminal on the controller.
-
Attach the controller to the mounting bracket and ensure it is securely in place.
-
Connect the controller to the main water supply and turn the water back on.
-
Power on the controller and follow the setup instructions provided by the manufacturer to configure the watering schedule, integrate with weather data, and set up remote access if available.
-
Test the system by running a manual watering cycle and checking that all sprinklers or irrigation zones are functioning properly.
Once the smart irrigation controller is installed and configured, you can start enjoying the benefits of efficient and convenient watering for your garden or lawn.
2. Utilizing Weather-Based Irrigation
Understanding Weather-Based Irrigation
Weather-based irrigation, also known as ET-based (evapotranspiration) irrigation, is a method of watering plants that takes into account the specific water needs of plants based on real-time weather conditions. Instead of watering on a fixed schedule, weather-based irrigation adjusts the watering frequency and duration to match the plants’ current water requirements.
The principle behind weather-based irrigation is to ensure that plants receive the optimal amount of water to thrive without wasting water through overwatering. By using sensors or accessing local weather data, the irrigation system can determine the rate at which water is lost from the plants due to evaporation and transpiration and adjust the watering accordingly.
Advantages of Weather-Based Irrigation
Weather-based irrigation offers several advantages over traditional fixed-schedule watering methods:
-
Water Efficiency: By tailoring the watering schedule to match the plant’s actual water needs, weather-based irrigation reduces water waste and promotes water conservation. Over time, this can result in significant savings on water bills.
-
Plant Health: By providing the right amount of water at the right time, weather-based irrigation promotes healthier plants. Underwatering can lead to stress and stunted growth, while overwatering can cause root rot and other diseases. Weather-based irrigation takes into account the specific water requirements of different plant species, ensuring optimal plant health.
-
Environmentally Friendly: By using weather data to determine when and how much to water, weather-based irrigation reduces the environmental impact associated with excessive water usage, such as strain on water sources and energy consumption for pumping water.
-
Cost Savings: By optimizing water usage and reducing water waste, weather-based irrigation can lead to cost savings on water bills. Additionally, some municipalities offer incentives or rebates for installing weather-based irrigation systems, further reducing the overall cost.
Implementing Weather-Based Irrigation
To implement weather-based irrigation, you will need either an on-site weather station or access to reliable local weather data. Depending on your irrigation system, there are different methods to integrate weather-based irrigation:
-
ET-Based Controllers: Some smart irrigation controllers come with built-in weather integration capabilities. These controllers use evapotranspiration data to adjust the watering schedule automatically.
-
Weather Station Integration: If you have an existing irrigation controller, you can integrate it with an on-site weather station. The weather station collects real-time weather data and sends it to the irrigation controller, which then adjusts the watering schedule accordingly.
-
Online Weather Service Integration: Another option is to use an online weather service that provides local weather data. These services often have APIs or integrations with smart irrigation controllers, allowing them to retrieve weather information and adjust the watering schedule accordingly.
When setting up weather-based irrigation, it is important to ensure that the weather data used is accurate and reliable. Regularly calibrate and verify the data to ensure optimal watering adjustments.
By implementing weather-based irrigation, you can ensure that your plants receive the right amount of water at the right time while conserving water and promoting plant health.
3. Using Soil Moisture Sensors
Importance of Soil Moisture Monitoring
Monitoring soil moisture levels is crucial for maintaining healthy plants and optimizing water usage. Soil moisture sensors provide real-time data on the amount of moisture in the soil, helping you determine when and how much to water. Here are some key reasons why soil moisture monitoring is important:
-
Water Conservation: By monitoring soil moisture levels, you can avoid overwatering, which is a significant source of water waste. Overwatering not only wastes water but can also lead to nutrient leaching and oxygen depletion in the soil, negatively impacting plant health.
-
Preventing Underwatering: On the other hand, monitoring soil moisture levels helps prevent underwatering, which can lead to stress and poor plant health. Soil moisture sensors can alert you when the soil moisture drops below a certain threshold, indicating the need for watering.
-
Plant Health: Different types of plants have different water requirements, and monitoring soil moisture allows you to tailor the watering schedule to each plant’s specific needs. Over time, this promotes healthier plant growth, stronger root systems, and increased resistance to pests and diseases.
-
Savings on Water Bills: By optimizing water usage and avoiding water waste, monitoring soil moisture can result in significant savings on water bills. Instead of watering on a fixed schedule, you can water only when necessary based on the actual moisture levels in the soil.
Types of Soil Moisture Sensors
There are various types of soil moisture sensors available on the market, each with its own advantages and considerations. Here are three common types of soil moisture sensors:
-
Tensiometers: Tensiometers measure soil moisture tension, which is an indirect indicator of soil moisture. These sensors consist of a porous cup that is buried in the soil at the desired root zone depth and connected to a gauge. The gauge shows the amount of suction required to pull water from the soil, reflecting the soil moisture level.
-
Capacitance Sensors: Capacitance sensors measure the dielectric constant of the soil, which is related to its moisture content. These sensors consist of two metal probes that are inserted into the soil. The electrical capacitance between the probes is measured, and the moisture content is estimated based on the capacitance value.
-
Resistive Sensors: Resistive sensors measure the electrical resistance between two electrodes in the soil. As the soil moisture changes, the electrical resistance also changes. These sensors provide a direct measurement of soil moisture content.
When choosing a soil moisture sensor, consider factors such as the type of soil in your garden, the desired depth of moisture measurement, and the sensor’s compatibility with your irrigation system or data logging system.
Installing and Calibrating Soil Moisture Sensors
The installation and calibration process for soil moisture sensors may vary depending on the type of sensor you choose. Here are some general steps to guide you:
-
Determine the desired depth of moisture measurement based on the root zone depth of your plants. Ideally, the sensor should be placed at or slightly below the roots.
-
Dig a hole or trench at the desired location and depth. Ensure that the hole is wide enough to accommodate the sensor.
-
Install the sensor according to the manufacturer’s instructions. This may involve inserting the sensor into the soil or burying it at the desired depth. Make sure the sensor is securely in place.
-
Connect the sensor to your irrigation controller or data logging system if applicable. Follow the manufacturer’s instructions for proper wiring and setup.
-
Calibrate the sensor to ensure accurate readings. The calibration process may differ depending on the sensor type, so refer to the manufacturer’s instructions for specific steps.
-
Periodically check and maintain the sensor to ensure accurate readings. Clean the sensor if necessary and perform any recommended maintenance tasks.
Remember that soil moisture sensors provide a tool for making informed decisions about watering, but they should be used in conjunction with other factors such as weather data and plant water needs. Regularly check the sensor readings and make adjustments to your watering schedule as needed to achieve optimal plant health and water conservation.
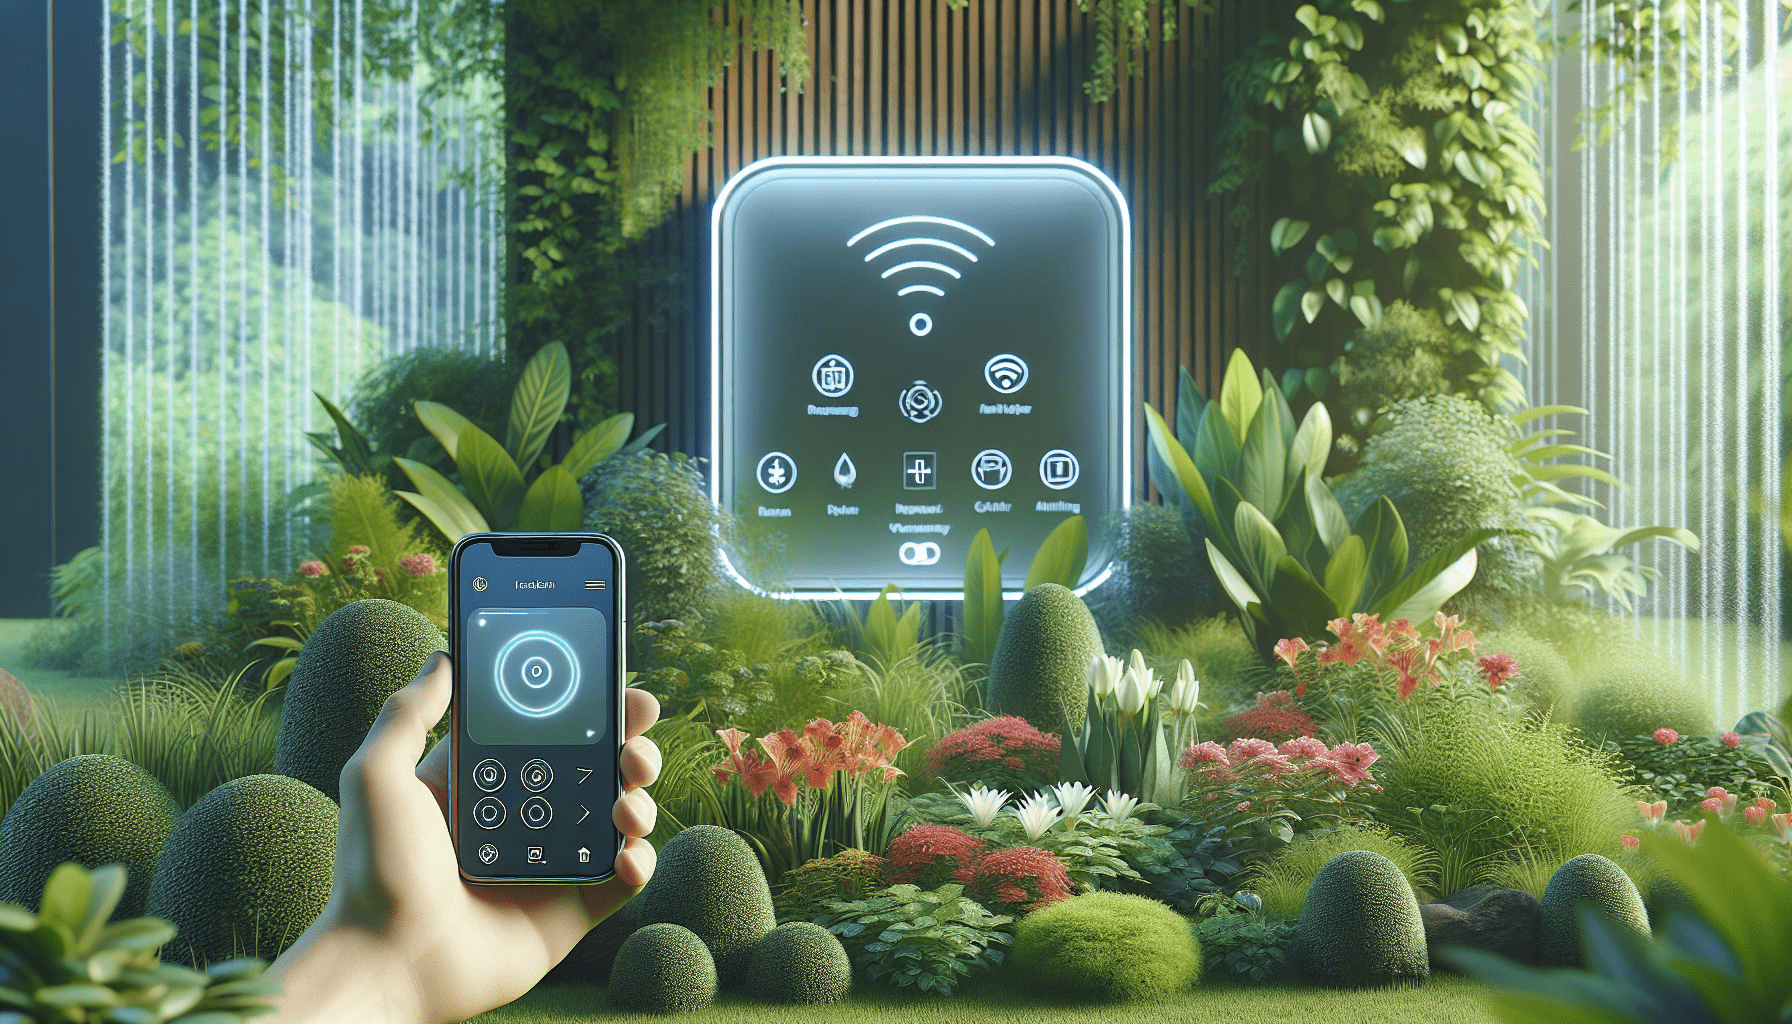
4. Remote Access through Mobile Apps
Benefits of Remote Access
Having remote access to your irrigation system through a mobile app offers several benefits:
-
Convenience: With remote access, you can control and monitor your irrigation system from anywhere using your smartphone or tablet. This eliminates the need to be physically present at home to make adjustments to the watering schedule or turn the system on/off.
-
Flexibility: Remote access allows you to make instant changes to your watering schedule based on real-time weather conditions or unexpected events. For example, if rain is forecasted, you can easily delay the watering schedule to prevent overwatering.
-
Water Efficiency: With remote access, you can closely monitor and manage your irrigation system, ensuring that it operates efficiently and conserves water. If you notice any issues or excessive water consumption, you can take immediate action to address them.
-
Peace of Mind: The ability to remotely access and control your irrigation system provides peace of mind, especially when you are away from home for extended periods. You can rest assured that your plants are being watered appropriately and that any issues can be addressed promptly.
Choosing the Right Mobile App
When selecting a mobile app for remote access to your irrigation system, consider the following factors:
-
Compatibility: Ensure that the mobile app is compatible with your smart irrigation controller or the specific system you have installed. Check the manufacturer’s documentation or website to verify compatibility.
-
User-Friendly Interface: Look for a mobile app that has a user-friendly interface with intuitive controls and clear visual feedback. The app should be easy to navigate and understand, even for users who are not tech-savvy.
-
Features and Functionality: Consider the features and functionality offered by the app. Some key features to look for include the ability to adjust watering schedules, monitor soil moisture levels, view historical watering data, receive alerts or notifications, and integrate with other smart home devices.
-
Stability and Reliability: Read user reviews and check the app’s ratings to assess its stability and reliability. A reliable app should have regular updates and bug fixes to ensure smooth operation.
-
Security: Ensure that the app provides secure and encrypted communication between your mobile device and the irrigation system. This is particularly important when accessing your system remotely over the internet.
Setting Up Remote Access
To set up remote access to your irrigation system through a mobile app, follow these general steps:
-
Install the manufacturer’s recommended mobile app on your smartphone or tablet. The app should be available for download from the official app store for your device (e.g., Apple App Store or Google Play Store).
-
Open the app and create an account if prompted. Follow the on-screen instructions to set up your account credentials.
-
Connect the mobile app to your irrigation system. This process may vary depending on your specific system and manufacturer. Generally, you will need to pair the app with your irrigation controller by entering the appropriate information or scanning a QR code.
-
Once the mobile app is successfully connected to your irrigation system, you should be able to remotely access and control the system’s settings and features through the app’s user interface.
-
Explore the app’s features and settings to customize your watering schedule, monitor soil moisture levels, and configure any additional preferences or notifications.
Remember to keep your mobile app and irrigation system software up to date to benefit from the latest features and security enhancements. Regularly check for updates and install them as recommended by the manufacturer.
5. Integrating Smart Home Systems
Advantages of Smart Home Integration
Integrating your irrigation system with a smart home system offers several advantages:
-
Centralized Control: Smart home integration allows you to control all aspects of your home automation, including your irrigation system, through a single interface. This centralized control simplifies the management of your home’s various systems and devices.
-
Automation and Synchronization: By integrating your irrigation system with other smart home devices or systems, you can automate and synchronize different actions. For example, you can set up a scenario where your irrigation system automatically turns off if the weather station detects rain.
-
Enhanced Monitoring and Analytics: Smart home systems often provide advanced monitoring and analytical capabilities. By integrating your irrigation system, you can access detailed data and insights about water usage, soil moisture levels, and other relevant information. This allows for informed decision-making and optimization of your irrigation practices.
-
Energy Efficiency: With smart home integration, you can leverage energy-saving features and algorithms. For example, your irrigation system can adjust watering schedules based on the overall energy consumption of your home, ensuring optimal energy efficiency.
Compatible Smart Home Systems
When choosing a smart home system to integrate with your irrigation system, consider compatibility with the following widely used smart home ecosystems:
-
Amazon Alexa: If you have an Amazon Echo device or compatible smart speaker, you can integrate your irrigation system with Alexa. This allows you to control your irrigation system using voice commands and create routines that synchronize watering with other smart home devices.
-
Google Assistant: Google Assistant provides similar integration capabilities as Alexa. By connecting your irrigation system to Google Assistant, you can control watering and automate actions through Google Home devices or compatible smartphones.
-
Apple HomeKit: Apple’s HomeKit ecosystem allows you to control and monitor various smart home devices, including irrigation systems, through the Apple Home app or Siri voice commands. Ensure that your irrigation system is compatible with HomeKit before integrating.
-
SmartThings: SmartThings is a popular smart home platform that supports a wide range of devices and systems. By integrating your irrigation system with SmartThings, you can create custom automation routines and control watering through the SmartThings mobile app.
Connecting Your Irrigation System to Smart Home
To connect your irrigation system to a smart home system, follow these general steps:
-
Ensure that your irrigation system supports smart home integration and is compatible with the specific smart home system you want to connect with. Check the manufacturer’s documentation or website for information on compatibility and setup instructions.
-
Set up and configure your smart home system according to the manufacturer’s instructions. This may involve creating an account, connecting compatible devices, and setting up the necessary network connections.
-
Open the smart home app associated with your chosen ecosystem and look for the option to add or connect new devices. Follow the on-screen prompts to add your irrigation system.
-
Depending on the smart home system, you may need to enter the device’s unique identifier or scan a QR code to associate it with your smart home ecosystem.
-
Once the irrigation system is successfully connected, you can use the smart home app or voice commands (if supported) to control and monitor your irrigation system. Explore the app’s features and settings to configure automation routines and customize your irrigation preferences.
Remember to regularly update the firmware or software for both your irrigation system and smart home system to benefit from the latest features, bug fixes, and security enhancements. Consult the manufacturer’s documentation or support resources for guidance on updating your devices.
6. Implementing Flow Sensors
Understanding the Role of Flow Sensors
Flow sensors are devices that measure the flow rate of water in your irrigation system. By monitoring the flow rate, you can detect abnormalities, such as leaks or blockages, and ensure that your irrigation system is operating optimally. Here are some key aspects of flow sensors:
-
Leak Detection: Flow sensors can detect even small changes in the flow rate, making them useful for identifying leaks in your irrigation system. By promptly detecting and addressing leaks, you can prevent water waste and minimize potential damage to your property.
-
Blockage Detection: A sudden drop in the flow rate may indicate a blockage within the irrigation system, such as a clogged pipe or a malfunctioning valve. Flow sensors can help you identify these issues and take corrective action to restore proper water flow.
-
Water Conservation: By monitoring the flow rate, you can ensure that your irrigation system is operating efficiently and not wasting water. Excessive flow rates may indicate overwatering or other issues that can be addressed to improve water conservation.
-
System Optimization: Flow sensors provide valuable data that can be used to optimize your irrigation system. By analyzing flow rate patterns, you can identify inefficiencies or areas for improvement and make adjustments to achieve better overall system performance.
Benefits of Flow Sensors
Implementing flow sensors in your irrigation system offers several benefits:
-
Water Savings: By monitoring the flow rate and promptly addressing any abnormalities or inefficiencies, flow sensors help reduce water waste. This can result in significant water savings, benefiting both the environment and your water bills.
-
Preventing Damage: Flow sensors enable early detection of leaks and blockages, allowing you to take immediate action to prevent further damage. Timely intervention can help avoid costly repairs and minimize potential property damage.
-
System Maintenance: By providing valuable data on the performance of your irrigation system, flow sensors assist in regular system maintenance. Identifying issues early on and scheduling appropriate maintenance tasks can extend the longevity of your system and ensure optimal operation.
-
Optimal Watering Control: Flow sensors can be used in conjunction with other irrigation system components, such as smart controllers or soil moisture sensors, to achieve optimal watering control. By incorporating flow data into the decision-making process, you can fine-tune your watering schedule for maximum water efficiency.
Installing and Configuring Flow Sensors
Here are general steps to guide you through the installation and configuration of flow sensors in your irrigation system:
-
Determine the appropriate location for the flow sensors. Ideally, they should be installed after the main water supply connection and before the irrigation system branches into individual zones.
-
Shut off the main water supply to the irrigation system and relieve any pressure by turning on a faucet or releasing air from the system.
-
Cut the irrigation system’s main water supply line at the selected location for the flow sensors. Ensure that the cut is clean and free from debris or obstructions.
-
Install the flow sensors according to the manufacturer’s instructions. This typically involves connecting the sensors to the cut ends of the main water supply line and securing them in place using appropriate fittings.
-
Connect the flow sensors to your irrigation system’s control panel or smart controller. Consult the manufacturer’s instructions for specific wiring instructions and connections.
-
Power on the system and perform a flow sensor calibration. Follow the manufacturer’s instructions to calibrate the flow sensors to accurately measure the flow rate.
-
Configure your irrigation system or smart controller to utilize the flow sensor data. This may involve setting up alerts or notifications for abnormal flow rates, adjusting watering schedules based on flow readings, or integrating flow data into overall system analytics.
Once the flow sensors are installed and configured, monitor the flow rate regularly and take appropriate action if any abnormalities or inefficiencies are detected. Consult the manufacturer’s instructions for recommended maintenance tasks and troubleshooting steps to ensure optimal performance of the flow sensors and your irrigation system.
7. Utilizing Rain Sensors
Importance of Rain Sensors
Rain sensors are devices that detect rain and prevent your irrigation system from watering during or immediately after rainfall. Integrating rain sensors into your irrigation system offers several important benefits:
-
Water Conservation: By preventing irrigation during rain events, rain sensors help conserve water. This reduces water waste and ensures that plants receive the optimal amount of water while avoiding overwatering.
-
Cost Savings: Conserving water through rain sensors can result in significant cost savings on your water bills. By minimizing unnecessary water usage, you can reduce your overall water consumption and associated expenses.
-
Environmental Considerations: Using rain sensors aligns with environmental conservation efforts by reducing the strain on water sources and promoting sustainable water usage practices. Conserving water helps preserve natural ecosystems and supports the overall health of the environment.
-
Plant Health: Overwatering can lead to root rot, poor plant growth, and increased susceptibility to diseases. Rain sensors prevent overwatering by ensuring your plants receive only the necessary water and reducing the risk of waterlogged soil and related issues.
Types of Rain Sensors
There are different types of rain sensors available, each with its own method of detecting rainfall. Here are two common types of rain sensors:
-
Disk or Tipping Bucket Sensors: These rain sensors feature a small container or disk that fills with rainwater. Once a certain amount of water is collected, the container tips or the disk moves, activating a switch that interrupts the irrigation system’s watering cycle.
-
Moisture-Activated Rain Sensors: These rain sensors rely on moisture-absorbing elements, such as cork discs or hygroscopic materials, to detect rainfall. When the sensor absorbs a sufficient amount of moisture, it triggers a switch that interrupts the irrigation system’s operation.
Both types of rain sensors function effectively and serve the same purpose of preventing irrigation during rainfall. Choose the type that best suits your irrigation system’s requirements and your preferences.
Installing and Adjusting Rain Sensors
Here are general steps to guide you through the installation and adjustment of rain sensors in your irrigation system:
-
Select a suitable location for the rain sensor. It should be exposed to the open sky and free from obstruction by trees or buildings.
-
Determine the optimal height for the rain sensor. Follow the manufacturer’s instructions for recommended height, typically around 4 to 6 feet above the ground.
-
Attach the rain sensor to a sturdy surface, such as a wall or post, using the provided mounting hardware. Ensure that the sensor is securely fastened.
-
Connect the rain sensor to the irrigation system’s control panel or smart controller. The wiring process may vary depending on your specific system, so refer to the manufacturer’s instructions for proper connections.
-
Adjust the rain sensor’s sensitivity settings according to your desired rain detection threshold. Most rain sensors have adjustable settings that allow you to fine-tune the sensitivity based on your local rainfall patterns.
-
Test the rain sensor by manually activating your irrigation system or running a test cycle. Observe whether the sensor interrupts or prevents irrigation when rainfall is detected.
-
Regularly inspect the rain sensor for debris or obstructions that could affect its performance. Clean the sensor if necessary and ensure that it remains properly aligned and operational.
Remember to periodically check and adjust the rain sensor’s sensitivity settings as needed, based on changes in your local weather patterns or specific irrigation requirements. Also, consult the manufacturer’s instructions for any recommended maintenance tasks or troubleshooting steps to ensure optimal functionality of the rain sensor.
8. Automation with Drip Irrigation Systems
Benefits of Drip Irrigation Systems
Drip irrigation systems offer several advantages over traditional sprinkler systems, making them an ideal choice for efficient and targeted watering. Here are some key benefits of drip irrigation systems:
-
Water Efficiency: Drip irrigation delivers water directly to the plant’s root zone, minimizing water loss due to evaporation or runoff. By ensuring that water reaches the plant’s roots precisely, drip irrigation reduces water waste and promotes water conservation.
-
Weed Control: By delivering water only to the desired plants, drip irrigation helps suppress weed growth. Traditional sprinkler systems tend to wet a larger area, promoting weed germination and growth.
-
Reduced Soil Erosion: The slow and precise application of water in drip irrigation minimizes soil erosion. Water is delivered directly to the soil, avoiding excessive surface or misting runoff that can contribute to erosion.
-
Plant Health: Drip irrigation provides optimal moisture levels for plant roots, promoting healthier plant growth and reducing stress. By avoiding overwatering or underwatering, plants develop strong root systems and become more resistant to pests and diseases.
Automation Options for Drip Irrigation
To further enhance the efficiency and convenience of drip irrigation systems, consider implementing automation options:
-
Timer-Based Automation: Install a timer or smart irrigation controller to automate the watering schedule. Set the desired watering duration and frequency based on the specific water requirements of your plants.
-
Soil Moisture Sensors: Integrate soil moisture sensors with your drip irrigation system to automate irrigation based on actual soil moisture levels. The sensors detect when the soil moisture drops below a certain threshold and activate the irrigation system to provide the necessary water.
-
Weather-Based Automation: Utilize weather data or a weather-based irrigation controller to automate the watering schedule. The system adjusts the irrigation based on real-time weather conditions, preventing overwatering during periods of rainfall or high humidity.
-
Mobile App Control: Connect your drip irrigation system to a mobile app that offers remote access and control. This allows you to monitor and adjust the irrigation schedule from anywhere using your smartphone or tablet.
By automating your drip irrigation system, you can optimize water usage, reduce manual intervention, and ensure that your plants receive the precise amount of water they need for healthy growth.
Implementing Automation for Drip Irrigation
Here are general steps to implement automation for your drip irrigation system:
-
Install a timer or smart irrigation controller compatible with drip irrigation systems. Ensure that the controller has the necessary features to accommodate drip irrigation, such as adjustable watering durations and frequency settings.
-
Connect the controller to your drip irrigation system, following the manufacturer’s wiring instructions. Verify that all connections are secure and properly insulated.
-
Program the controller with the desired watering schedule. Set the appropriate watering duration and frequency based on the specific needs of your plants and the soil type. Consider factors such as plant species, weather conditions, and soil moisture levels.
-
If using soil moisture sensors, connect them to the controller or irrigation system as per the manufacturer’s instructions. Configure the sensors to activate the irrigation system when soil moisture drops below the desired threshold.
-
If utilizing weather-based automation, integrate the irrigation controller with a weather service or weather data source. Configure the controller to adjust the watering schedule based on real-time weather conditions.
-
Test the automation settings by running a manual watering cycle and observing the performance of the drip irrigation system. Make any necessary adjustments to the settings based on your observations.
-
Monitor the performance of the automated drip irrigation system regularly. Check soil moisture levels, observe plant health, and make adjustments to the watering schedule or automation settings as needed.
By implementing automation for your drip irrigation system, you can maximize efficiency, conserve water, and ensure optimal plant health and growth.
9. Monitoring Water Usage
Importance of Monitoring Water Usage
Monitoring water usage in your irrigation system is essential for several reasons:
-
Water Conservation: Water is a valuable resource, and monitoring usage helps promote water conservation. By tracking and analyzing water consumption, you can identify inefficiencies, leaks, or excessive water usage and take corrective action to minimize waste.
-
Cost Management: Monitoring water usage allows you to manage your water-related expenses effectively. By understanding your irrigation system’s water consumption patterns, you can identify opportunities for cost savings and make informed decisions about optimizing water usage.
-
System Optimization: Monitoring water usage provides data that can be used to optimize your irrigation system’s performance. By analyzing water consumption in different zones or areas, you can adjust watering schedules, fine-tune flow rates, or identify areas for improvement.
-
Environmental Awareness: Monitoring water usage increases your awareness of the environmental impact associated with irrigation. By tracking consumption and taking actions to reduce water waste, you contribute to sustainable water management and environmental stewardship.
Devices for Water Usage Monitoring
Several devices and methods can be used to monitor water usage in your irrigation system. Here are some commonly used options:
-
Water Flow Meters: Water flow meters are devices that measure the volume of water flowing through the irrigation system. They can be installed at the main water supply line or at individual zones to accurately measure water usage.
-
Smart Irrigation Controllers: Some smart irrigation controllers offer built-in water usage monitoring capabilities. These controllers track and record water consumption data, which can be accessed and analyzed through the accompanying mobile app or web interface.
-
Water Meter Integration: If you have a water meter installed for your property, you can integrate it with your irrigation system. By monitoring the water meter readings before and after irrigation events, you can determine the water consumed by your irrigation system.
-
Data Logging Systems: Data logging systems, combined with appropriate sensors, can be used to track water usage. These systems record and store water consumption data, allowing for detailed analysis and reporting.
Choose a monitoring device or method that aligns with your specific requirements and budget. Consider factors such as data accuracy, ease of installation, compatibility with your irrigation system, and the level of detail you require for analysis.
Interpreting Water Usage Data
Once you have collected water usage data from your monitoring devices, it is important to interpret and analyze the data to gain insights and identify opportunities for improvement. Here are some considerations when interpreting water usage data:
-
Comparison to Established Targets: Compare the actual water consumption to any established targets or goals you have set for your irrigation system. Evaluate whether you are meeting those targets or if adjustments are required.
-
Zone-Specific Analysis: Analyze water consumption data for individual irrigation zones or areas to identify variations or uneven usage. This can help you identify areas that may require optimization or adjustments to the watering schedule.
-
Seasonal Variations: Take into account seasonal variations in water usage. Plants’ water requirements may change throughout the year, and analyzing usage data over different seasons allows you to fine-tune your irrigation practices accordingly.
-
Comparison to Historical Data: Compare current water usage data to historical data from previous years or quarters. This allows you to identify trends, track improvements, and assess the effectiveness of any water-saving measures implemented.
-
Leak Detection: Analyze water usage data for any sudden spikes or irregular patterns, as this may indicate leaks or other issues. Promptly address any anomalies to prevent further water waste and damage to your irrigation system.
-
Integration with Other Factors: Consider integrating water usage data with other factors such as weather data or plant water requirements. This allows for a more comprehensive analysis and optimization of your irrigation practices.
By interpreting water usage data, you can make informed decisions about optimizing your irrigation system, reducing water waste, and achieving more efficient and sustainable water usage.
10. Troubleshooting and Maintenance
Identifying Common Issues
Regular system maintenance and troubleshooting are essential for ensuring optimal performance of your irrigation system. Here are some common issues to watch for and troubleshoot:
-
Low Water Pressure: Low water pressure in your irrigation system can result in uneven or inadequate watering. Check for clogged or leaking pipes, valves, or sprinkler heads. Clean or replace any damaged components as necessary.
-
Clogged Sprinkler Heads: Clogging is a common issue with sprinkler heads. Make sure the nozzles or filters are clean and free from debris. Regularly check and clean sprinkler heads to maintain proper water distribution.
-
Valve Malfunctions: Malfunctioning valves can disrupt the flow of water to specific zones or cause water to continuously flow. Inspect and test the valves to ensure they open and close properly. Replace any faulty valves as needed.
-
Electrical Issues: If your irrigation system is electronically controlled, check for any electrical issues such as loose connections, blown fuses, or malfunctioning controllers. Ensure that all wiring connections are secure and functioning correctly.
-
Water Leakage: Water leakage can occur in various parts of an irrigation system, leading to water waste and potential damage. Inspect all pipes, connectors, and fittings for signs of leaks or damp spots. Repair or replace any damaged components promptly.
-
Inadequate Coverage: Insufficient coverage occurs when certain areas receive inadequate watering. Adjust sprinkler heads or add additional sprinklers to achieve proper coverage. Ensure that water is reaching all targeted areas effectively.
Performing Regular System Maintenance
Regular maintenance is crucial for the longevity and optimal performance of your irrigation system. Here are some essential maintenance tasks:
-
Inspect and Clean Sprinkler Heads: Regularly check and clean sprinkler heads to remove any debris or blockages. Inspect the nozzles for wear or damage and replace as necessary. Adjust the direction and pattern of the sprinkler heads as needed.
-
Check for Leaks: Routinely inspect all pipes, connectors, and fittings for signs of leaks. Repair or replace any damaged components to prevent water waste and damage to your property.
-
Clean Filters and Strainers: If your irrigation system has filters or strainers, clean them regularly to prevent clogging and ensure consistent water flow. Remove any debris or sediment that may have accumulated in the filters.
-
Adjust and Calibrate Sprinkler Heads: Periodically check and adjust the spray pattern, distance, and direction of the sprinkler heads. Calibrate the heads to ensure even water distribution and avoid overspray or runoff.
-
Trim Vegetation: Trim any vegetation or plants that may be obstructing the sprinkler heads or blocking water flow. Ensure that the water can flow freely and reach all targeted areas.
-
Check for Proper Water Pressure: Monitor and maintain the appropriate water pressure for your irrigation system. Excessive pressure can cause pipe bursts or inefficient water distribution, while low pressure can result in inadequate watering.
-
Test and Inspect Valves: Test each valve in your irrigation system to ensure proper operation. Check for any leaks, sticking valves, or failure to open/close. Repair or replace any malfunctioning valves as needed.
Troubleshooting Methods
When troubleshooting your irrigation system, follow these general methods:
-
Identify the Problem Area: Isolate the specific zone or component where the issue is occurring. This helps narrow down the troubleshooting process and allows you to focus on the relevant components.
-
Visual Inspection: Thoroughly inspect the problem area, looking for any visible signs of damage, leaks, or other abnormalities. Visual inspection often provides valuable clues to identify the root cause of the issue.
-
Systematic Testing: Test each component or system in a methodical manner to identify any faults. This may involve turning on individual zones, checking water flow rates, or using pressure gauges to assess water pressure.
-
Documentation: Keep detailed records of the troubleshooting process, including any changes made, tests conducted, and observations. This documentation helps track progress, identify patterns, and assists in diagnosing recurring issues.
-
Consult Manufacturer’s Documentation or Support: If you encounter difficulties or need specific guidance, consult the manufacturer’s documentation or contact their support for troubleshooting assistance. They can provide valuable insights and solutions to address the issue.
-
Professional Assistance: If the issue persists or is beyond your expertise, consider seeking professional assistance from a certified irrigation specialist. They have the knowledge and experience to diagnose and repair complex issues effectively.
By performing regular maintenance and employing systematic troubleshooting techniques, you can ensure optimal performance and longevity of your irrigation system, minimizing downtime and maximizing water efficiency.
Effective Ways to Monitor and Control Your Irrigation System Remotely
[This is a placeholder for the introduction of the article. The introduction will provide an overview of the topic and briefly introduce the various methods for remote monitoring and control of irrigation systems.]
[Include an opening paragraph to introduce the topic and the importance of remote monitoring and control of irrigation systems. Discuss the increasing need for efficient water usage and the desire for convenience and automation in managing irrigation systems. Transition into the main sections of the article.]
[Add the comprehensive article content based on the provided outline.]
This post may contain affiliate links which means I may receive a commission for purchases made through links. Learn more on my Private Policy page.