This post may contain affiliate links which means I may receive a commission for purchases made through links. Learn more on my Private Policy page.
Are you interested in learning the best practices for using a seed drill? Whether you’re a seasoned farmer or a beginner in the field of agriculture, understanding the most effective techniques for using a seed drill can be crucial to maximizing your crop yields. In this article, we will explore the best practices that can help you make the most out of your seed drill and ensure that your seeds are sown efficiently and accurately, leading to a successful harvest. So, let’s dig in and discover the key to achieving great results with a seed drill!
Preparation before using a seed drill
Choosing the right seed drill
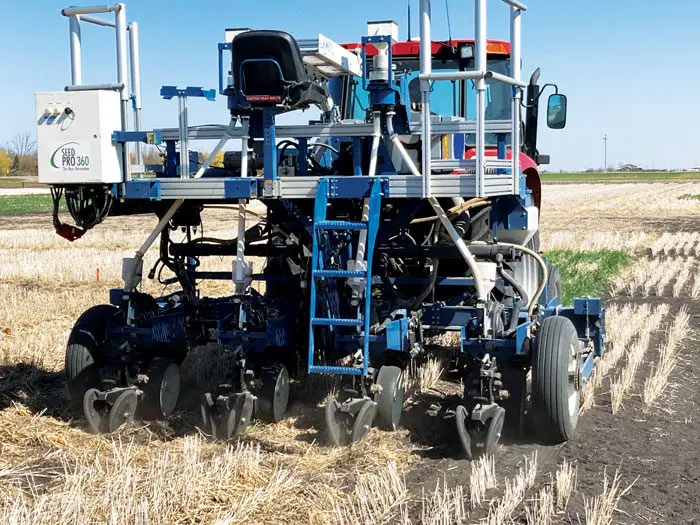
Before using a seed drill, it is crucial to choose the right one for your specific needs. Consider factors such as the size of your field, the type of crop you are planting, and the terrain. There are different types of seed drills available, including pneumatic seed drills, precision seed drills, and no-till seed drills. Research and compare the features, capabilities, and reviews of different models to find the one that suits your requirements.
Inspecting the seed drill
Before putting the seed drill into operation, it is essential to inspect it thoroughly. Check for any signs of damage or wear and tear on the seed drill, including the frame, seed hoppers, seed meters, row units, and openers. Inspect the wheels, tires, and bearings for any signs of damage or excessive wear. Ensure that all the parts are in proper working condition and that there are no loose bolts or missing components. This inspection will help identify any potential issues that need to be addressed before using the seed drill.
Preparing the field
Preparing the field is an important step in ensuring successful seed drilling. Begin by removing any obstacles or debris from the field, such as rocks, branches, or large clumps of soil. Smooth out the field using a harrow or disc to create a consistent seedbed. This will promote even seed distribution and proper seed-to-soil contact. Additionally, consider performing soil tests to determine the nutrient levels and pH of the soil, allowing you to adjust fertilizer application accordingly.
Calibrating the seed drill
Proper calibration of the seed drill is crucial to ensure accurate seed placement and seeding rates. Begin by adjusting the seed meter settings according to the desired seeding rate. Use the calibration charts provided by the manufacturer to set the drill correctly. Perform a calibration test by running a known amount of seeds through the drill and measuring the actual seeding rate. Adjust the seed drill settings accordingly until the desired seeding rate is achieved. Calibration is essential to avoid under or over-seeding, which can significantly impact crop establishment and yield.
Seed selection and preparation
Selecting appropriate seeds
Choosing the right seeds is vital for successful crop establishment. Consider factors such as the climate, soil conditions, and desired crop characteristics when selecting the seeds. Look for high-quality seeds from reputable suppliers to ensure good germination rates and disease resistance. Consider using certified seeds to guarantee their quality and purity. Consult with agricultural experts or local extension services for guidance on seed selection based on your specific farming conditions.
Cleaning and treating seeds
Cleaning and treating seeds before using them in a seed drill is essential to avoid potential issues such as seed-borne diseases and poor germination. Thoroughly clean the seeds by removing any debris, such as chaff, weed seeds, or damaged seeds. Use seed cleaning equipment or methods such as air screen cleaners to achieve optimal seed purity. Additionally, consider treating the seeds with fungicides or insecticides to prevent seed-borne diseases and protect against pests. Follow the instructions provided by the seed supplier or agricultural experts regarding seed cleaning and treatment techniques.
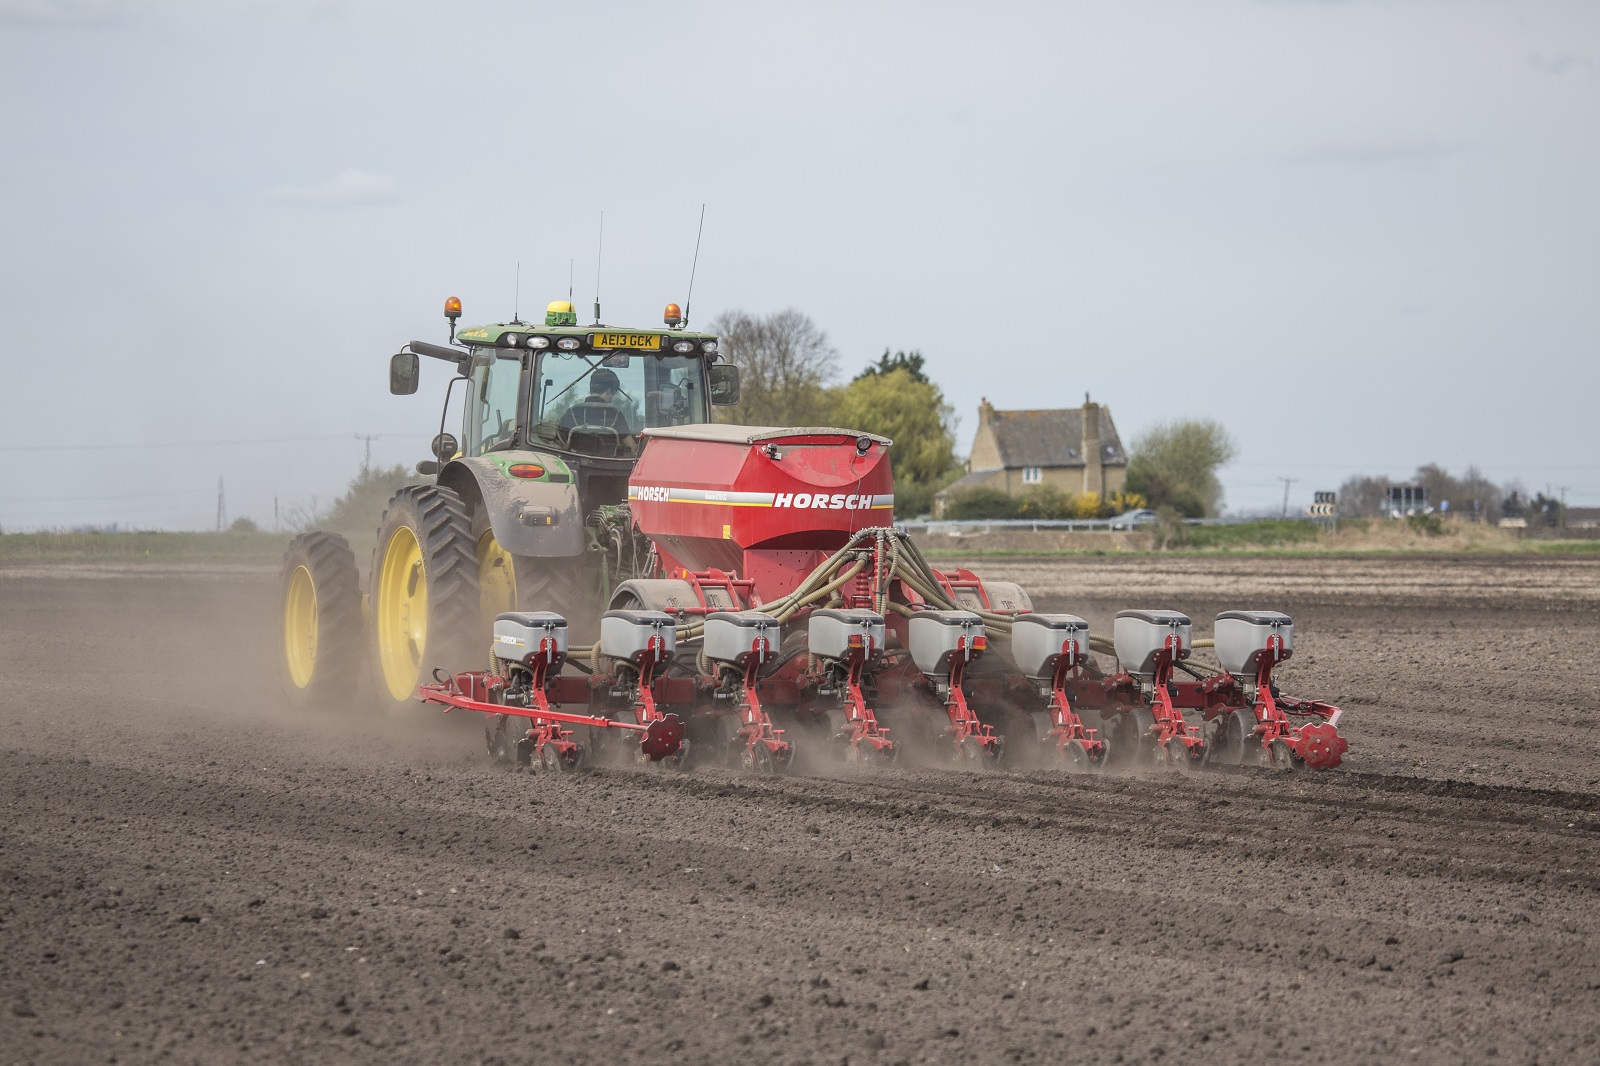
This image is property of cropscience.bayer.co.uk.
Adjusting the seed drill settings
Setting the seed depth
Setting the seed depth correctly is crucial to ensure proper seed-to-soil contact and germination. The ideal seed depth varies depending on the crop being planted and the prevailing soil conditions. Consult with local agricultural experts to determine the recommended seed depth for your specific crop. Adjust the seed drill’s depth control mechanism accordingly to achieve the desired seed placement depth. Maintaining consistent seed depth throughout the field will promote uniform seed germination and crop establishment.
Establishing the seeding rate
Establishing the appropriate seeding rate is an essential factor in achieving optimal crop yield. The seeding rate is influenced by factors such as the crop type, desired plant population, and the condition of the field. Refer to seed charts, agricultural publications, or consult with local experts to determine the recommended seeding rate for your specific crop. Adjust the seed drill’s seeding rate control mechanism according to the desired rate. Regularly monitor and adjust the seeding rate during operation as needed.
Adjusting row spacing
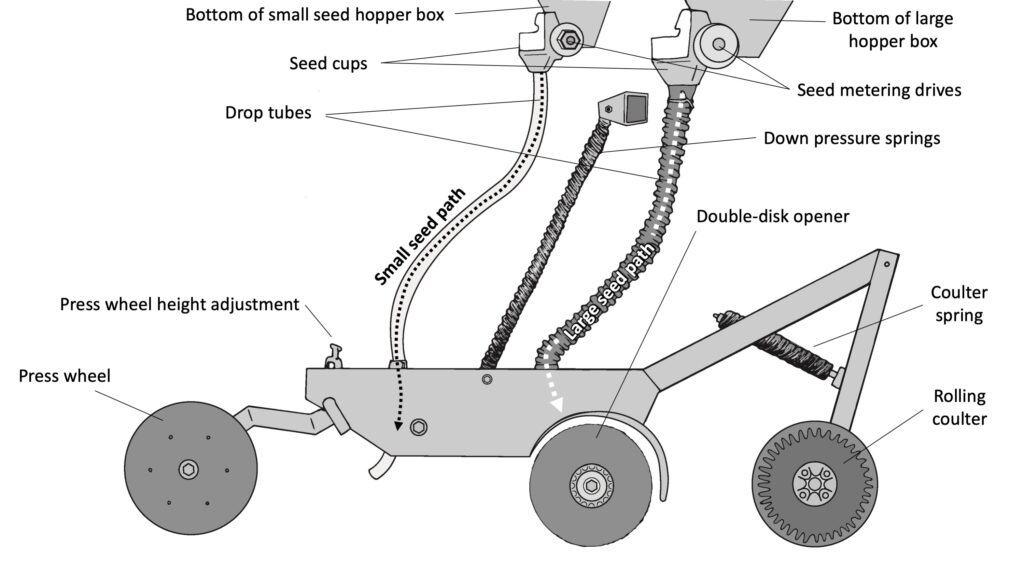
Proper row spacing plays a crucial role in achieving optimal crop establishment and yield. The row spacing should be chosen based on the crop type, field conditions, and equipment capabilities. Consult with agricultural experts or refer to guidelines specific to your crop for the recommended row spacing. Adjust the seed drill’s row spacing settings accordingly. Ensure that the row units are aligned properly and the seed tubes are positioned at the desired spacing. Proper row spacing promotes efficient use of resources and allows for better weed control and crop management.
Setting the seed furrow closers
Adjusting the seed furrow closers is crucial to facilitate optimal seed-to-soil contact and create the ideal environment for seed germination. The seed furrow closers are responsible for closing the furrow after the seeds have been placed, ensuring that the seeds are adequately covered with soil. Adjust the furrow closers according to the soil type, moisture content, and the depth of the seed placement. It is essential to find the right balance between closing the furrow tightly enough to provide proper seed-to-soil contact while avoiding compaction that could hinder seedling emergence.
Operating the seed drill
Starting the seed drill
Before starting the seed drill, ensure that all safety measures are in place, and all operators are familiar with the machine’s operation. Check that all the seed hoppers are filled with the cleaned and treated seeds. Start the tractor or power unit according to the manufacturer’s instructions. Engage the seed drill’s drive system while ensuring that all components are functioning properly. Begin moving at a slow and steady speed, allowing for efficient seed placement and spacing.
Maintaining proper speed
Maintaining a proper speed is crucial to ensure consistent seed placement and adequate seed-to-soil contact. Excessive speed can result in erratic seed distribution and poor seed depth control, while driving too slowly may cause uneven seed spacing. Refer to the seed drill’s operating manual or consult with local experts to determine the recommended speed for your specific seed drill and crop. Regularly monitor the speed during operation and make adjustments as needed to achieve optimal performance.
Ensuring even coverage
Achieving even seed coverage is essential for uniform crop establishment and proper plant spacing. Monitor the seed distribution during operation to ensure that all rows are receiving an equal number of seeds. Adjust the seed drill’s metering system or seeding rate control mechanism if any discrepancies or gaps are observed. Regularly check for blockages or malfunctions that could affect seed distribution and make adjustments as necessary. Maintaining even seed coverage promotes healthy crop growth and reduces competition between plants.
Keeping seed drill operating conditions
While operating the seed drill, it is crucial to monitor the operating conditions to ensure optimal performance and prevent any potential issues. Regularly inspect the seed drill for any signs of wear, damage, or malfunction. Pay attention to the seed metering system, openers, and seed tubes for any blockages or misalignment. Check the seed hoppers for proper seed flow and ensure that the drive system is functioning smoothly. Regularly lubricate moving parts and perform routine maintenance as recommended by the manufacturer. Keeping the seed drill in good operating condition will contribute to its longevity and performance.
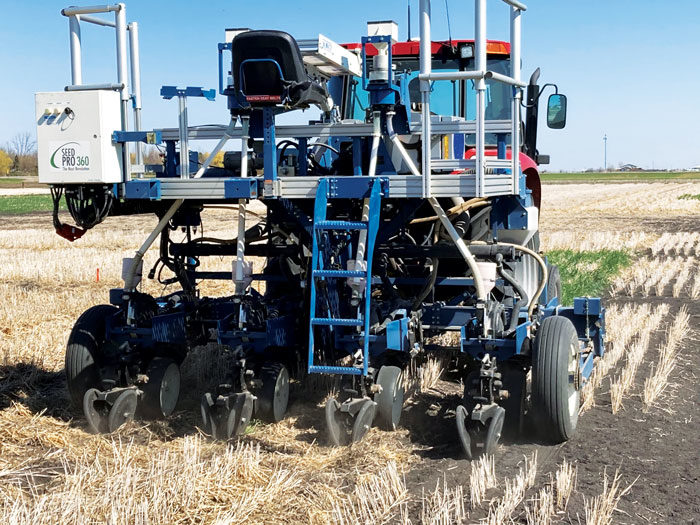
This image is property of www.covercropstrategies.com.
Frequent checks during operation
Monitoring seed distribution
Continuously monitor the seed distribution during operation to ensure that all rows are receiving an appropriate amount of seeds. Look for any signs of uneven distribution, gaps, or overlaps. Adjust the seed drill’s metering system or seeding rate control mechanism as needed to achieve consistent seed placement across all rows. Regularly inspect the seed tubes, openers, and furrow closers for any blockages or malfunctions that could affect seed distribution. Address any issues promptly to ensure uniform crop establishment.
Checking seed depth
Regularly check the seed depth during operation to ensure that seeds are being placed at the desired depth. Use a seed depth gauge or similar tool to measure the depth of the seeds immediately after they are placed in the furrows. Compare the actual seed depth with the desired depth and make adjustments to the seed drill’s depth control mechanism if necessary. Maintaining proper seed depth promotes uniform germination, root development, and overall crop establishment.
Inspecting seed-to-soil contact
Inspecting the seed-to-soil contact is crucial to ensure effective seed germination and establishment. Check the furrow immediately after seed placement to ensure that the seeds are adequately covered with soil. Look for any gaps, uneven soil coverage, or loose soil that may hinder seedling emergence. Adjust the seed drill’s furrow closing mechanism if needed to improve seed-to-soil contact. Proper seed-to-soil contact promotes efficient nutrient and moisture uptake, contributing to healthy plant growth.
Verifying proper furrow closing
Verify that the furrows are closing properly after the seeds have been placed to ensure adequate seed coverage and protection. Inspect the furrows immediately behind the seed drill to ensure that they are closing tightly and that the seeds are not exposed. Adjust the seed drill’s furrow closing mechanism as necessary to achieve proper seed coverage. Ensuring proper furrow closing reduces seed exposure to sunlight, prevents drying out, and protects the seeds from pests or birds.
Preventing seed drill clogging
Monitoring the seed hopper
Regularly monitor the seed hopper during operation to ensure a consistent flow of seeds. Check for any signs of clogging, such as overflowing seeds or uneven seed flow. Adjust the seed hopper’s metering system or mechanisms to achieve a steady and consistent seed flow. Remove any debris or foreign objects that may obstruct the seed flow. This preventive measure ensures uninterrupted seed supply and prevents potential blockages in the seed drill.
Avoiding seed bridging
Seed bridging is a common issue that can occur when seeds clump together and form a bridge, obstructing the seed flow. To prevent seed bridging, ensure that the seed hopper is filled with dry and clean seeds. Avoid overfilling the seed hopper, as this can increase the likelihood of seed bridging. Regularly check the seed flow and, if necessary, use mechanical aids or gentle agitation to break any potential seed bridges. Preventing seed bridging allows for uninterrupted seed flow and ensures consistent seed distribution.
Cleaning out debris
During operation, regularly check for debris or foreign objects that may accumulate in the seed drill. Debris such as straw, leaves, or rocks can obstruct the seed flow, leading to clogging or uneven seed distribution. Use brushes, compressed air, or other appropriate tools to remove any debris from the seed drill. Clear any blockages in the seed tubes, metering system, or seed hoppers. Regular cleaning of the seed drill minimizes the risk of clogging and ensures optimal performance.
Inspecting tubes and openings
Inspect the seed tubes and openings for any signs of wear, damage, or blockages. Check for any bent or misaligned seed tubes that may hinder proper seed placement. Verify that the openings are clear and free from debris or obstructions that could affect seed distribution. Address any issues promptly by repairing or replacing damaged parts and clearing any blockages. Maintaining clear and functional seed tubes and openings promotes accurate seed placement and prevents potential seed drill clogging.
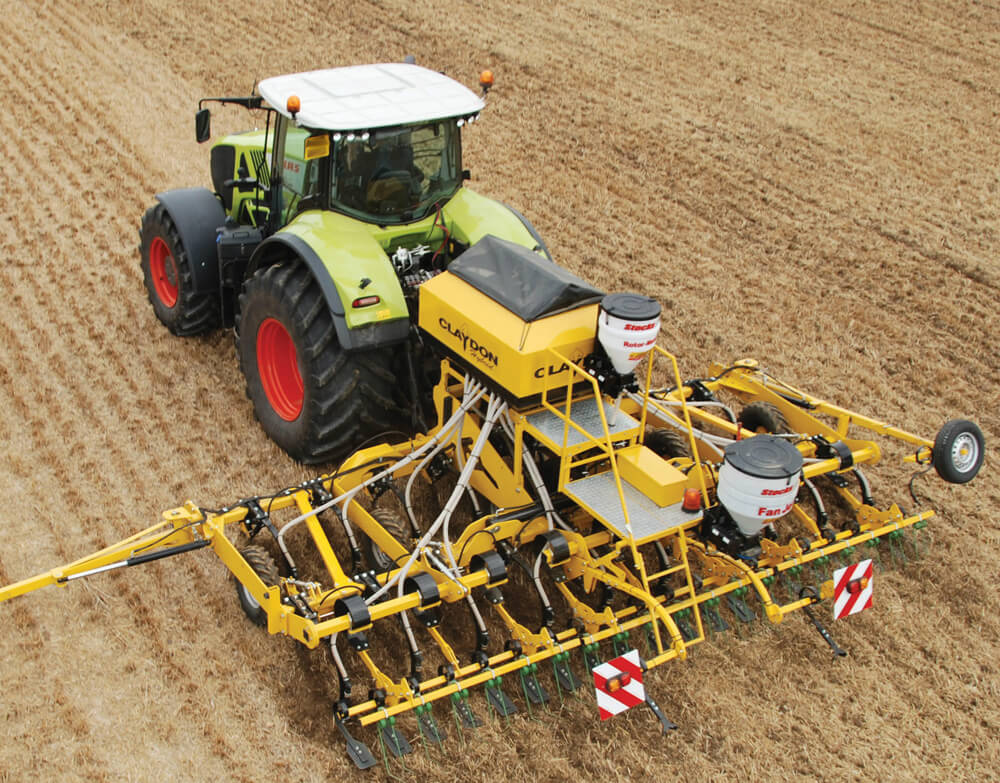
This image is property of claydondrill.com.
Post-seeding maintenance
Cleaning and storing the seed drill
After completing the seeding operation, it is crucial to clean the seed drill thoroughly. Remove any remaining seeds from the hoppers, tubes, and metering system. Use brushes, compressed air, or water to clean any debris or soil residue. Pay attention to hard-to-reach areas, such as furrow closers or seed tubes. Once the seed drill is clean, store it in a dry and secure location, preferably protected from the elements. Proper cleaning and storage prevent corrosion, damage, and contamination, ensuring that the seed drill remains in good condition for future use.
Maintaining documentation
Keep accurate and up-to-date documentation of the seed drill’s operation and maintenance. Record the seeding rate, seed depth, row spacing, and any adjustments made during the operation. Note any issues or observations regarding seed distribution, seed-to-soil contact, or furrow closing. Maintain a log of maintenance activities, including cleaning and repairs. This documentation provides valuable information for future reference, troubleshooting, and optimizing the performance of the seed drill.
Inspecting and replacing worn parts
Regularly inspect the seed drill for any signs of worn or damaged parts. Pay attention to components such as openers, furrow closers, seed meters, and seed tubes. Replace any worn or damaged parts promptly to ensure optimal performance and avoid potential breakdowns during future operations. Consult with the seed drill manufacturer or authorized dealers to obtain genuine replacement parts. Proper maintenance and timely replacement of worn parts contribute to the longevity and reliability of the seed drill.
Properly disposing of leftover seeds
Properly disposing of leftover seeds is important to prevent the spread of weeds or diseases. Avoid using leftover seeds from one season to another, as they may have reduced germination rates or carry over seed-borne diseases. Consult with local agricultural experts or extension services to determine the appropriate disposal methods for your specific crop seeds. Dispose of leftover seeds in a manner that minimizes the risk of contamination and adheres to local regulations and best practices.
Addressing common challenges
Dealing with difficult soil conditions
Difficult soil conditions, such as compacted soil or heavy clay, can pose challenges during seed drilling. Consider using machinery or techniques such as tilling, deep tillage, or soil amendments to improve soil structure and alleviate compaction. Consult with agricultural experts to determine the appropriate methods for your specific soil conditions. Adjust the seed drill’s settings, such as seed depth or furrow closers, to accommodate challenging soil conditions. Proper soil preparation and seed drill adjustments help promote successful seed penetration and seed-to-soil contact.
Minimizing seed and fertilizer separation
Seed and fertilizer separation can occur when using a seed drill, leading to uneven distribution or reduced effectiveness of the fertilizer. Consider using equipment or techniques such as banding or side-dressing to minimize seed and fertilizer separation. Adjust the seed drill’s settings and placement to ensure that the seeds and fertilizer are placed close together. Consult with agricultural experts for guidance on optimal seed and fertilizer placement for your specific crop and field conditions. Minimizing seed and fertilizer separation contributes to efficient nutrient uptake and promotes uniform crop growth.
Mitigating issues with weeds and pests
Weeds and pests can pose challenges to crop establishment and growth. Implement integrated pest management practices to mitigate the risk of weed or pest damage. This may include using herbicides, cultural practices, or biological controls. Regularly monitor the field for signs of weeds or pest infestations and take appropriate measures to address them. Consider using seed treatments or resistant crop varieties to minimize the impact of pests and diseases. Proactive weed and pest management contribute to healthier crops and higher yields.
Managing seed drill problems
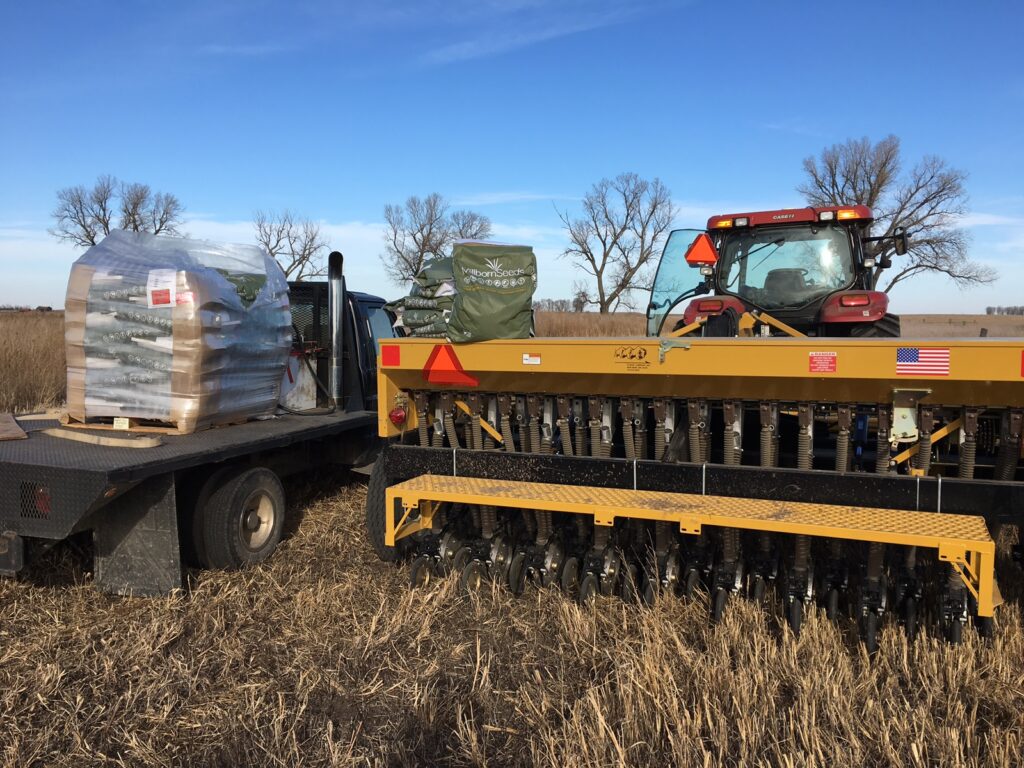
In the event of seed drill problems or malfunctions during operation, it is important to address them promptly to minimize downtime and potential crop damage. Identify the cause of the issue and consult the seed drill’s operating manual or contacts the manufacturer for troubleshooting guidance. In some cases, it may be necessary to seek professional assistance for repairs or adjustments. Regular maintenance, adherence to best practices, and proper operation techniques can help prevent or minimize seed drill problems. Regular inspections, prompt repairs, and timely adjustments ensure that the seed drill operates efficiently and effectively.
This image is property of www.millbornseeds.com.
Benefits of using a seed drill
Increased efficiency and accuracy
Using a seed drill offers increased efficiency and accuracy compared to traditional manual seed planting methods. The seed drill’s precise seed metering and placement, coupled with its capability to cover large areas quickly, allow for efficient seed distribution. This results in time savings and reduced labor requirements, making seed drilling more cost-effective.
Conservation of seeds
Seed drills offer better seed conservation compared to traditional broadcasting methods. The seed drill’s precise placement ensures that seeds are optimally distributed, minimizing seed wastage due to uneven scattering. By conserving seeds, farmers can reduce costs and improve overall profitability.
Time and cost savings
Using a seed drill saves both time and costs associated with manually planting seeds. The efficient and accurate seed distribution reduces the time required for planting, allowing farmers to cover more acreage in a shorter period. Additionally, the reduction in labor hours and the use of fewer seeds contribute to overall cost savings.
Improved crop establishment
The use of a seed drill promotes improved crop establishment and uniform growth. The precise seed placement and optimal seed-to-soil contact created by the seed drill result in consistent germination and seedling emergence. This leads to more uniform plant populations, improved nutrient and water uptake, and ultimately, higher crop yields.
Ensuring safety while using a seed drill
Understanding safety instructions
Before operating a seed drill, familiarize yourself with the manufacturer’s safety instructions provided in the operating manual. Understand the potential risks associated with the equipment and the necessary precautions to prevent accidents or injuries. Ensure that all operators are adequately trained and aware of the safety guidelines.
Wearing appropriate protective gear
When using a seed drill, it is important to wear suitable protective gear. This may include safety goggles, gloves, sturdy footwear, and hearing protection. Protective gear helps minimize the risk of injuries from flying debris, chemicals, or loud noises. Ensure that all operators are wearing the appropriate protective gear during seed drill operation.
Maintaining a safe distance from moving parts
When operating a seed drill, maintain a safe distance from moving parts to avoid potential accidents. Keep bystanders, animals, and unauthorized personnel away from the seed drill. Be cautious when working near rotating components, such as the metering system or openers. Maintain a safe distance to reduce the risk of entanglement or injury.
Properly securing the seed drill during transport
When transporting a seed drill, ensure it is properly secured to prevent accidents or damage. Follow the manufacturer’s guidelines for securing the seed drill to the tractor or transportation vehicle. Double-check all connections, such as hitch pins or safety chains, to ensure they are secure. Adhere to local regulations and best practices for safe transportation of agricultural equipment.
Using a seed drill requires careful preparation, adjustment, operation, and maintenance. By following these best practices, you can ensure efficient and effective seed placement, resulting in successful crop establishment and higher yields. Remember to prioritize safety at all times and consult with agricultural experts or extension services for guidance specific to your farming conditions.
This image is property of secure.caes.uga.edu.
This post may contain affiliate links which means I may receive a commission for purchases made through links. Learn more on my Private Policy page.

